Repair And Install Bumper Easily
Should I Repair Or Replace My Bumper?
While inspecting the bumper for damage, check if the bumper is deformed beyond recognition. If that's the case and the damage is big, consider replacing it. The same goes for major cracks and tears because they are beyond repair and affect the structural integrity of the bumper and weaken it. However, minor scratches with small cracks and tears can be repaired with the use of plastic repair products that are easily available.
Furthermore, not all plastic bumpers are the same because car manufacturers use different kinds of plastic, like PP (Polypropylene), TPE (thermoplastic elastomer), and PPO (polyphenylene oxide). Usually, the type of material used on your vehicle's bumper can be determined by looking for the specific markings on the inside of the bumper. While buying a repair product for your bumper, ensure that it is compatible with the type of material used on your vehicle. This can save you a lot of trouble, time, and money.
Another thing to consider while deciding to repair or replace your vehicle's bumper is the cost. If you have a small dent that can be safely pulled out, the cost will be less. However, a bigger dent or crack that needs to be filled in and repainted will comparatively eat up more money. In some cases, the cost of replacing the bumper is less than repairing it, so choose wisely. Several factors, like the location of damage, amount of damage, paint damage, and the material of the bumper, can affect the repair costs.
How To Fix A Bumper Dent?
There are several ways to repair your vehicle's bumper, but the best way is to remove the bumper from the car to easily facilitate the repair process. Usually, the bumpers are held onto the vehicle's body with the help of bumper cover parts like bumper brackets and fasteners. Take your time to locate and map out all the fasteners to easily remove the bumper from the body. These methods can be performed easily with simple tools and do not require painting your bumper unless the dent is too big and is cracked.
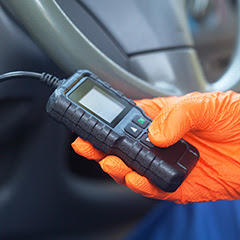
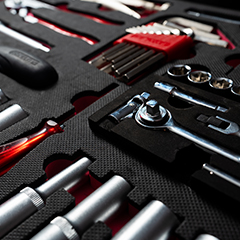
Tools Required:
1. Using a Heat Gun Or A Hairdryer
Park the car on a level surface and lift the vehicle securely using jack stands.
Access the underneath of the vehicle using creepers and remove and splash guard by loosening the metal bolts or plastic clips. This will give you access to the inner portion of the bumper.
Loosen the bumper fasteners using a socket and ratchet set and screwdrivers.
With the bumper disassembled, start with pushing the dent out with your bare hands. Give it a slight nudge, not too hard, to see if minor dents can be fixed and pushed out.
If it doesn't work or the dent is too big, use a hot air gun or hairdryer and point it directly at the damaged area to warm it up. This will make the dented part of the bumper flexible.
While using a heat gun, ensure that the gun is kept 3 or 4 feet away from the bumper or it will heat up the bumper, causing it to melt. It should take around 5 minutes to warm the bumper until it becomes pliable.
Now try pushing out the bumper again. You should notice the caved-in portion of the bumper coming out as you apply the pressure. Use a small wooden block to push the bumper out evenly. Observe the bumper from various angles to see if the dent has been removed, and the bumper is back to its normal curvature.
2. Using Hot Water
Remove the dented bumper from your vehicle.
Boil a few liters of water and pour it on the dented portion of the bumper.
Use a folded terry cloth towel or a piece of wood to push the dent out. Avoid using your hands or wear gloves because the boiling water can scald or burn your hands in the process.
Let the bumper cool and view it from various angles to see if the dent is leveled out.
Repeat the process if necessary to remove leftover undulations and remember to let the bumper cool down before you add the boiling water to repeat the process.
3. Using Dry Ice
With the bumper removed from the vehicle, use a heat gun or a hairdryer on the dented area of the bumper.
Grab a small block of dry ice and place it on the top of the dent. You can also use aluminum foil or a towel to prevent the paint from getting frost damage.
The dent should pop back into its original shape. If it doesn't or it partially pops out, simply reheat the bumper and repeat the above steps.
This dry ice method also works on dented metal surfaces. The rapid heating and cooling of the bumper surface allow the dent to pop back into its original shape.
How to Fix A Cracked Plastic Bumper?
A severely cracked bumper has to be replaced, but if it is mildly damaged and has small cracks, it can be repaired using a plastic solvent or with the help of a soldering iron. The plastic solvents or bonders can be used to fix a bumper that is mildly damaged and has sufficient structural strength and can be easily restored. In the other method, using a soldering iron, one can melt the plastic along the edges of the cracks. When the molten plastic solidifies, it covers up the crack in the bumper.
Tools Required:
Plastic Solvent Kit (matching the type of plastic on your vehicle)
Sandpapers
Duct Tape
Paint Filler
Paint Primer
Paint Color (Matching Your Bumper Color)
1. Using A Plastic Solvent
Lift the vehicle and secure it on jack stands.
Remove the bumper and clean away all the dirt, grease, or dust from the front, rear, and especially around the cracked area of the bumper.
Use an angle grinder to remove any excess hair and jagged plastic to straighten out the ridges. You can also use a rotary tool with a grinding stone for a precise finish around the cracked edges.
Take 40-grit sandpaper and rub the area around the crack from the inside of the bumper. Remove the excess dust with a rag or blow it away with compressed air.
Once the sanding is done and the bumper is clean from the inside, prepare the solvent as per the instructions.
Apply a generous amount of plastic solvent on the inner side of the bumper. This will dissolve the plastic from both sides, making it one piece.
Apply duct tape to the outer side of the bumper to pull the cracked parts together for better bonding and stability.
Let the solvent work for the required amount of time and once done, remove the tape and sand the outer side of the bumper around the cracks using a 320-grit sandpaper so the body filler will hold perfectly.
Apply body filler to the crack using a scraper and let it dry for the time specified in the instructions.
Sand the body filler with 80-grit sandpaper and smoothen it out again using 1000 grit sandpaper. This will create a smooth surface for the paint to bond to.
Apply an even coat of primer on the freshly sanded surface and let it dry before you apply the next layer. Apply 3 to 4 layers of primer.
Now paint that area of the bumper where you have applied the primer to finish the job.
2. Using A Soldering Iron
Remove the bumper from the vehicle and place it safely without enlarging the cracks.
Next prepare the surface by washing the cracked area and sanding it down with 80 grit sandpaper.
Heat the soldering iron and, when it's sufficiently hot, melt the edges from both sides of the crack while holding them together. The plastic will melt and you can guide it along the crack using the iron itself to seal the crack as it solidifies.
Keep repeating this procedure along the line of crack to repair the crack from the inside of the bumper. You can use an extra piece of plastic to add to the bumper from the inside as you weld the crack.
Use 120-grit sandpaper to smooth out the weld and then gradually move on to 300 and 500 grit sandpapers for a fine finish.
Add body filler to fill the gap using a scraper from the outside of the bumper.
Once it dries up, smoothen it out with sandpaper and apply a good coat of primer to it.
The last step is to paint and apply a clear coat to the bumper to match it to the original color.
How to Fix A Cracked Fibreglass Bumper?
It is important to identify the material your vehicle's bumper is made of. Look at the cracks and if you see long white hair, it shows that you have a fiberglass bumper. Working on fiberglass bumpers requires a little caution. Always wear a dust mask while sanding fiberglass, as it can be harmful if inhaled. Fixing your cracked fiberglass bumper is a fairly easy process. To repair your fiberglass bumper you'll need fiberglass resin, matting strips, and a liquid hardening agent. These parts are also available as pre-packed fiberglass repair kits.
Tools Required:
Acetone or Dirt and Grease Remover
Fiberglass Resin
Fiberglass Matting Strip
Hardening Agent
Sandpapers
Masking Tape
Paint Filler
Paint Primer
Paint Color (Matching Your Bumper Color)
Slide the bumper off, your car by removing all the fasteners.
Grind the crack and the sharp edges along the crack to smoothen it out. For this, you can use a flat grinding head attached to a handheld die grinder.
To treat the small damaged areas around the crack, use 600-grit sandpaper and grind the surface.
Use a dirt and grease remover or simply use acetone to scrub the surface. Carefully dampen the rag with acetone and rub the surface. It will remove the pre-existing resin so the new one can bond with the surface.
Cut the fiberglass matting according to the size of the crack so it gets completely covered.
Grab a small empty container and mix the resin and hardener together in the proportion mentioned on the resin container. Mix them until they form a homogenous paste.
Apply the matting to the back of your bumper by using the resin mix on top of it. Cover the matting entirely with the resin and it will stick to the surface.
Repeat the same process by applying matting and resin to other cracked areas and letting it dry for about 2 hours. If the damage is big, you can also apply the matting to the front of the bumper as well.
Once the resin is cured and dry, use a 600-grit paper and sand down that area, giving it a smooth finish.
Use a body filler to fix minor grooves, undulations and cracks left after sanding.
Now sand the entire bumper using wet and dry sandpaper. The goal is to get a smooth surface all across the bumper for a uniform coat.
Mask the areas you don't want to paint using paper or masking tape and apply multiple layers of primer.
All that your bumper now needs is a paint job. Paint your bumper in the color you want to.
How to Fix Bumper Scratches?
Like dents and cracks, scratches are very likely to occur on your bumpers and can range from barely visible and small to deep scratches, which can spoil the look of your vehicle. If you slide your fingernail across the scratch and it stops sliding or gets stuck, it can be considered as a decent enough scratch that needs to be fixed. Taking it to a body shop will keep your car away from you for a day or two and can cost quite a bit as well. So, why not fix bumper scratches yourself? Follow the simple stepwise procedure below and get your bumper repaired quickly.
Tools Required:
Automotive Paint
Automotive Primer
Automotive Clear Coat
Sandpaper
Scuff Pad
Cleaning Towel
Wax And Grease Remover
Scratch Filling Putty
With your car parked safely, identify the scratches that need to be treated and mask the areas around the scratches.
Sand the damaged area of the bumper and smoothen the scratches using 2000-grit sandpaper.
Wipe the panel with a cleaning towel and with a wax and grease remover.
If some scratches are not sanded out and are still visible, fill them with a thin layer of scratch-filling putty and let it dry. Follow up by sanding it again for a smooth finish.
Use a scuff pad and scuff over and a little around the repair area. This will help the paint stick to the surface properly.
Now add a few layers of automotive primer until you have covered the damaged area properly.
Let the primer dry and then sand the surface again using fine-grit sandpaper.
Finally, apply multiple coats of automotive paint followed by a clear coat to finish the process.
How To Replace Your Vehicle’s Bumper?
Replacing the bumper of your vehicle is one of the less complex jobs that you can perform on your car. It requires basic technical knowledge and a simple set of tools.
Tools Required:
Open the hood of your car and locate the fasteners that attach the front bumper to your vehicle. Most vehicles today use fasteners like plastic or nylon push pins along with bolts.
Remove all the push pins that hold the bumper in place using a clip removal tool or a flathead screwdriver to pry it open.
Loosen the retaining bolts at the top and bottom of the bumper using a socket and ratchet set. If your vehicle has a splash shield attached to the bumper, remove that too.
Turn the wheel to the right to gain access to the pins located inside the wheel well. Pull out the pins that secure the fender liner to the bumper and remove the bolts behind the liner.
With all the bolts and pins removed, do a double-check and carefully remove the bumper by pulling it from the sides where the plastic locks are located.
With the bumper out, remove the fog light housing. Also remove the parking sensors, airbag sensors, and other electrical wiring attached to the bumper.
Install the new bumper by connecting the harness and securing it in place just like the old one by properly positioning the locks and pins.
If your old bumper brackets are rusted, bent, or broken, replace them with new ones.
Follow the same procedure to remove the rear bumper.
There is no doubt about the fact that scratches and dents can decrease the value of your car. Not only can it make it harder for you to sell at a decent price, but if the damage is significant, it can leave the car body vulnerable and open to rust. Furthermore, the bumper helps in absorbing the force of an impact in the event of a collision. If it is dented or cracked, the bumper's ability to absorb the damage is compromised. On top of that, bumpers in modern cars are equipped with parking sensors, cameras, airbag sensors, and air intakes on some vehicles. Damage to the bumpers can cause these systems to perform abruptly, therefore, making it necessary for you to repair or replace your bumpers. By performing this bumper repair and replacement process, you will be able to learn how to fix the bumper yourself and also save almost two-thirds of your body shop bill, without hiring the services of a professional.
These repair methods are provided for informational purposes only. Any damage or injury incurred in the practice of these methods is not the responsibility of PartsAvatar Canada. Many factors such as location, material, and the size of the damage play an important role in deciding how your bumper material will react to heating-cooling cycles. We always encourage you to consult a professional if you cannot perform the repairs yourself.
Buying Guides & Articles on Auto Parts
Articles and Guides written by auto parts experts to ensure you have all the required knowledge to make the correct purchase here at Parts Avatar.
Read all Guides & Articles