Everything About Oil Pan & Dipstick
The oil pan, also known as the sump, is a metal dish that sits on the bottom of the engine block and houses the engine oil while it is not in use. The oil pump has a pickup tube that dangles into the sump and chumps up oil; once used, the oil returns to the sump. The following article explains the role of oil pan and oil dipstick.
What Is A Car Oil Pan & Dipstick?
Oil Pan:
The oil pan is attached to the bottom of the car engine with bolts and is the reservoir for oil which gets pumped throughout the engine to lubricate, clean and cool the moving parts. A pump forces the oil from the pan through a filter to remove dirt and other debris before it circulates through the engine. The pan comprises steel or aluminium and holds four to six quarts of oil, depending upon the car engine.
Oil Dipstick:
There is a dipstick, a metal rod in all the engines which extends into the oil reservoir. The car engine is cleaned and lubricated with motor oil. Oil dipstick also checks the level of the oil regularly and ensures that the car engine is running well. You can avoid costly repairs and cleaning of your engine, resulting from driving with insufficient or grubby motor oil. You should get your car oil inspected as soon as possible.
Where Is My Car Oil Pan & Dipstick Located?
The oil pan is situated directly below the engine's transmission. It is bolted directly to the engine and also has a gasket so that there is no issue of leakage.
What Are The Symptoms Of Bad Oil Pan & Dipstick?
There are a few things which might cause your oil pan & dipstick to malfunction. Watch for the following symptoms if you suspect a bad oil pan & dipstick:
- Puddles of oil under the car - If it's time to replace your vehicle’s oil pan, then you will be able to notice puddles of oil under your car. It usually starts with small leakages and then gets worse with passaging time. If this issue is left unattended, they can also damage the car engine. In order to avoid serious damage to your vehicle, you should get the leakage of the oil fixed immediately after you have noticed it.
- Leaks around the oil drain plug - It is the oil drain plug which helps to hold the oil and then release it during the process of change of oil. With passaging time, the oil drain plug can start turning faulty resulting in leakage. There is a crush type gasket in the drain plug which might fail with passaging time or if not replaced. Now if the plug is stripped out during the process of oil change, then it can take some time to observe the leakage.
- Visible damage to oil pan - One another sign that there is a need to replace the oil pan of the car is visible damage. The oil pan can be hit or might get dented when it passes over a low-lying part of the road. The impact of this can be a fast damage or something which would begin as a drip and then steadily get worse. If you notice that there are some defects in the oil, then there would be a requirement to get it replaced before the leakage starts.
Which Tools Do I Need To Repair My Car Oil Pan & Dipstick?
If you are searching for top quality tools to repair your car oil pan & dipstick, then your search is over. Have a look at some tools which you might need to repair your car oil pan & dipstick:
Oil Pan:
- Service manual
- Pneumatic jack
- Wrench socket
- Oil pan changing kit (it will include new oil pan and gasket)
- Clean rag
- Sealant
- Oil filter
- Oil
Oil Dipstick:
- Telescoping magnetic tool
- Socket set
- Oil drain pan
- Automotive-grade epoxy
- Car soap or cleanser
- Sandpaper
Which Top Brands Oil Pan & Dipstick Parts Should I Choose?
There are some leading car parts brands which are more than just products or services as they give rise to memories and emotions related with the quality. So have a look at some top brands for car oil pan & dipstick.
- Spectra Premium Industries Oil Pan & Dipstick
- Dorman/Help Oil Pan & Dipstick
- Cooling Depot Oil Pan & Dipstick
- Dorman (Oe Solutions) Oil Pan & Dipstick
- Mr. Gasket Oil Pan & Dipstick
- Gates Oil Pan & Dipstick
- Atp Professional Autoparts Oil Pan & Dipstick
Which Parts Are Related To My Car Oil Pan & Dipstick?
Are you familiar with basic car oil pan & dipstick related parts? If no, then have a look at some important components of the car oil pan & dipstick.
- Oil Cap
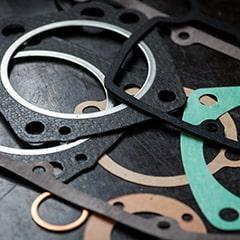
- Oil Pan Gasket
- Oil Dipstick Tube
- Oil Level Sensor Connector
- Oil Pan Bolt Sets
- Oil Level Relay
What Is The Repairing Cost Of My Car Oil Pan & Dipstick?
We bet that you’re thinking how much a car oil pan & dipstick replacement cost. Just keep in mind that it is not as easy as putting a fast and hard number on it. This is because the replacement/repair cost differs for every car oil pan & dipstick and also varies depending on how in-depth the repair needs to be. If you are thinking about the exact cost, then you might take help of an expert mechanic. If you want to substitute your oil pan, then it would range between $150 to $250.
What Are The Steps Of Changing My Car Oil Pan & Dipstick?
Do you want to change your oil pan & dipstick on your own? Then have a look at the steps of changing the oil pan & dipstick below:
Oil Pan:
Step 1
The foremost step is to jack the car up. The oil from the oil sump should be drained. If you want to do this, then you should get a set of quality auto ramps which would help in raising your car or you can always use a professional-grade pneumatic jack. Just keep in mind that you should not rely on the jack which would come with your car. The car should be jacked on a levelled surface.
Step 2
Then the oil pan should be placed under the car. Make sure that the oil pan should be placed just below the tank from where the oil would start flowing.
Step 3
Then you should turn the screw-in oil pan plug about a quarter-turn left by utilizing the correct-sized wrench socket to remove the oil. Now once it has been loosened, then the rest of the way should be turned to ensure that you don’t lose the plug. There are small magnets built into the plugs, to catch any metal shards generated by the car engine.
Step 4
Then the old pan should be loosened up. You always use a socket to loosen the old pan so that the new one can be installed.
Step 5
After that the existing oil pan should be removed. It should be taken off and then all you have to do is to put it aside. A clean rag should be taken and then the edge of the pan should be wiped around so that the metal shards can be removed.
Step 6
Then you should run a bead of sealant used to hold the fiber gasket to the new oil pan, and then the gasket should be installed.
Step 7
The new pan should match perfectly with its housing and then one or two screws should be inserted to hold it up. Just be sure that you have to utilize the screws or bolts which are on either end of the pan so that it would remain in place, and after that you should install the other screws or bolts finger-tight.
Step 8
The screws or bolts should be tightened up until they start to feel snug. The gasket might get damaged because of over - tightening resulting in leakage, so just be sure that you are tightening it correctly.
Step 9
The old oil filter should be replaced and then you should add the right amount of oil. Just be sure that you watch for leakages.
Oil Dipstick:
Step 1
The upper half of the broken oil dipstick should be pulled out carefully. The telescoping magnetic tool should be inserted into the dipstick shaft and moved around until you feel a slight tug, so the magnetic tool has come in contact with the second half of the dipstick. Then you should gently pull it out. If the dipstick falls off, then you can always scoop it out again with a magnetic tool.
Step 2
If you are unable to pull out the broken half of the dipstick, then it is possible that it might have fallen off into the oil pan. If this happens, then you should make sure to place a drain pan just underneath drain pan bolt.
Step 3
The bolt should be removed with a socket wrench and the oil should be allowed to spill out into the drain pan. Now once the oil is drained, the remaining bolts which attach the oil pan onto the engine should be loosened up. You should search for the broken piece of dipstick inside the pan and should be retrieved. Once you have pulled out the dipstick, you should be sure to bolt back the oil pan in place.
Step 4
The broken pieces of the dipstick should be cleaned with water and soap. Just be sure that the oil should be removed fully. Now once they have been cleaned fully, then they should be glued together with epoxy.
Step 5
Then you should get rid of the rough edges around the glued area by sanding it off. If there are any shavings and any debris from the dipstick, then you should wipe them off.
Step 6
The oil dipstick should be placed inside the shaft. The oil should be refilled and then you would be good to go. Just remember that you should not use a stick with a glue to retrieve a broken dipstick from the engine as the glue might fall off and then the oil supply can be contaminated.
Buying Guides & Articles on Auto Parts
Articles and Guides written by auto parts experts to ensure you have all the required knowledge to make the correct purchase here at Parts Avatar.
Read all Guides & Articles