How To Do Wheel Alignment At Home - A Complete DIY Wheel Alignment Guide
Most automotive enthusiasts understand what wheel alignment is, and the terms associated with it like caster, camber, and toe. However, for aligning the wheels to proper specifications, taking your car to a professional is the only option. Although it is a good habit to get your wheel aligned by a mechanic, the cost of wheel alignment can be heavy on your pocket if you are a DIY enthusiast who keeps modifying the vehicle. Every suspension or steering mod means a visit to the auto shop and recurring wheel alignment costs. Furthermore, if you own an old Camaro or a late 70s car that you love, the modern-day and advanced shops do not have the specs for your vehicle. In either case, it's beneficial in the long run to know how to align your car wheels yourself. If you enjoy the satisfaction of knowing how to do car repair yourself and save money, adding wheel alignment skills to your mental toolbox can be very beneficial. This DIY wheel alignment guide will help you do wheel alignment at home.
In this article:
What Is Wheel Alignment?
Wheel alignment refers to the angle of your wheels in comparison to each other and other components of the vehicle. To align the wheels of a vehicle, the suspension has to be adjusted so the direction and the angle of the tire with the road surface can be changed. Every vehicle manufacturer has specific measurements for each make and model to ensure optimum performance and handling. Wheel specialists or automotive workshops use modern wheel alignment machines to ensure your vehicle stays within the recommended limits and handles efficiently while driving. If you are wondering how often wheel alignment should be done, a good practice is to get it checked every 10000 kms or whenever you experience problems with the handling of your vehicle. Usually, the wheel alignment interval is mentioned in the owner’s manual of your vehicle.
Why Wheel Alignment Is Important For A Vehicle?
Apart from routine vehicle repair and maintenance, wheel alignment is also important for your vehicle. Any problem with wheels can negatively affect the steering and handling of the vehicle. Aligning the wheels of your car ensures all four wheels are straight and moving in the same direction. A good wheel alignment is necessary for safe and confident driving. All the wheels of your vehicle should be correctly aligned with each other to avoid premature wear. When you drive with bad wheel alignment, your tires will wear down quickly and unevenly, causing trouble in steering or controlling your vehicle. Some benefits of wheel alignment are as follows:
1. Smoother Ride Quality
One major benefit of wheel alignment is improved handling. With misaligned wheels, the vehicle pulls towards the left or right even when the steering is straight. To compensate for this misalignment, the driver has to pull the steering wheel towards the opposite side. In such a condition, it can become distracting, tiring, and can even lead to an accident. Keeping your wheels aligned prevents such a situation and improves the driveability of the vehicle.
2. Increased Tire Life
Wheel misalignment can cause the tires to wear out unevenly and quickly. If your tires are thinning out more from the edges compared to the middle, it's a clear sign of wheel misalignment. Getting your wheels aligned at routine intervals prevents your tires from premature wear and increases their life. This is an important aspect of proper tire maintenance.
3. Increased Fuel Efficiency
If the wheels are aligned correctly, the tires of your vehicle rotate in a straight line, in perfect unison with each other. It helps to offer better traction without slipping. This results in reduced rolling resistance and increased fuel efficiency.
4. Reduced Repairs
Misaligned wheels are also susceptible to damage while riding through various terrains. A jolt or sudden impact from a pothole can cause damage to the suspension system and also lead to a bad wheel alignment. Wheel alignment can benefit you by saving your vehicle’s components from such a breakdown and also saving big bucks on auto repairs in the future.
What Are The Symptoms Of Misaligned Wheels?
The alignment of your wheels can get disturbed over time, causing various problems and hampering the overall driving experience. A bad wheel alignment can also lead to extreme wear on the components and increased maintenance costs. Therefore, it is necessary to know about the signs of a bad wheel alignment.
1. Vehicle Pulling To One Side
The most common symptom of misaligned wheels is when the vehicle pulls to one side while driving at high speeds. If you are driving straight down the road, the vehicle should go straight even if you take your hand off the steering wheel. If it pulls towards the left or right, your wheels might need alignment. However, a slope on the road and improper tire pressures can also be the reason for this symptom. Always check your tire pressures before doing this test. If your vehicle still pulls towards one side, you need a wheel alignment.
2. Uneven Steering Wheel
While driving straight, the steering wheel of your vehicle should be perfectly centered. An easy way to check if the steering wheel is centered is to look at the manufacturer's emblem. If it points straight and remains level, your steering is fine. But if the emblem tips to one side, your wheels might be misaligned. This can also happen if the steering wheel is installed improperly and is off- center.
3. Steering Wheel Vibration
A steering wheel could vibrate while driving due to misaligned or unbalanced tires. However, this can also be caused because of bent axle, worn-out wheel bearings, and warped brake rotors. You must get it checked by a mechanic to ensure your wheels are properly aligned.
4. Uneven Tire Wear
Often, the symptoms of bad wheel alignment are not clear and usually overlooked. One such symptom is uneven tire wear, which can happen if your wheels are misaligned. If you rarely look at the tire treads of your vehicle, misaligned wheels can wear them out quickly. The problem is only noticeable when the tires wear out too much and the vehicle pulls to one side. It's a good habit to get your tires checked during service or routine maintenance to ensure there is no uneven tire wear and the wheels are aligned properly.
How Vehicle Wheels Get Misaligned?
Proper wheel alignment keeps your tires in great condition, saving you money on tires over the years. Over time, the wheels of a vehicle can get misaligned even if you drive normally and on well-paved roads. Several factors contribute to wheel misalignment and some of them are mentioned below.
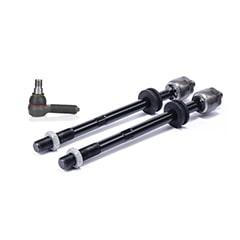
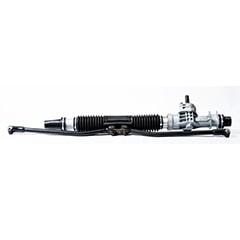
- Shocks: If you hit a pothole at a high speed, or drive over a curb, the impact is enough to disturb the alignment of your wheels. A collision or fender-bender can throw off the alignment of your vehicle. The greater the force, the greater the effect. A good way to avoid this is to drive slowly on broken roads. A shock can also damage the tie rod of your vehicle. Before beginning the wheel alignment, always check your tie rods for damage. Refer to our tie rod replacement cost guide for an estimated cost of repair.
- Wear And Tear: The suspension and steering parts of your vehicle can also get worn out, leading to wheel misalignment. Usually, the suspension and steering components start to gather slack and play which ultimately throws off the handling and makes the car unstable.
- Modifications: If you are changing your car's body, suspension, or steering components, the wheels have to be aligned. These modifications are not a simple plug-and-play and definitely need a wheel alignment for your car to perform properly.
What Are The Different Terms Used In Wheel Alignment?
Car wheel alignment is not a voodoo science and makes complete sense if you are well acquainted with the alignment basics of the car. DIY wheel alignment is a simple procedure necessary to ensure how the wheels and tires are positioned. The three major factors that affect the wheel alignment of a car are caster angle, camber angle, and toe. If any of these measurements is out of specification, you must align your wheels to ensure proper handling and driveability. Before we begin with the DIY wheel alignment process, let's discuss these terms to gain a better understanding.
Caster
It is the angular displacement between the steering axis and the vertical axis of the wheels being steered. In other terms, it is a forward or backward slope of a line drawn through the upper and lower steering pivot points, i.e. the steering axis. The caster angle allows the manufacturer to balance the steering effort, high-speed stability, and cornering capabilities of the vehicle. The mechanic finds the fine balance between the positive caster angle and the negative caster angle to correct misalignment.
a) Positive Caster - If the imaginary line or the steering axis slopes towards the rear of the vehicle, then it has a positive caster. The downside to the positive caster is that it increases the steering effort. However, the advantage of a positive caster is that the vehicle has better stability at high speeds and cornering. A positive caster is beneficial to the vehicle, as it increases the lean of the tire when the vehicle is cornering.
b) Negative Caster - If the steering axis slopes towards the front of the vehicle, then it is known as a negative caster. A negative caster will allow you to steer less around turns but may cause you to drift if you are driving straight forward. Most cars feature positive caster but are also provided with a slight negative caster, to prevent unintentional turning or straying. Too much negative caster allows the car to wander while driving.
Camber
Camber is the angle difference or the deviation between the edge of the tire and an imaginary vertical line running through the center of the wheel. To put it simply, a camber is the amount of angle the top of the tire leans in or out. It is measured in degrees and is also called a camber angle. A slight negative camber of around 0.5-1 degrees is given on the passenger cars. Depending upon wheel orientation, camber can be of two types:
a) Positive Camber: Camber, when looked at from the top of the wheel, is positive if the edge of the tire tilts outward. With increased positive camber, the tire will not be in complete contact with the road, reducing traction and grip causing increased wear on the outer treads of the tires. Off-road vehicles use positive camber because it improves the steering response and decreases the steering effort required for turning the vehicle. Positive camber is also provided in load-carrying vehicles because the heavy load on these vehicles causes outward leaning wheels to straighten up, increasing the tire contact patch and vehicle stability.
b) Negative Camber: If the tire tilts inwards, i.e. the deviation or angle between the center line and tire edge, is negative, it's negative camber. During negative camber, the inside of the tire is more in contact with the road. This results in camber thrust, causing the car to move straight but leading to uneven wear and increased stress on the tire's inner shoulders. Negative camber is used on high-performance vehicles for better cornering in racing.
Toe Angle
In a vehicle, the toe is the angle at which the front tires point. Toe angle can be understood as the difference in the distance between the leading and trailing edges of the front tires. Toe-in and toe-out can also be identified by looking at the tires from the top. If the front of the tires is out, it's a toe-out and if they are tilted towards the inside, it’s a toe-in. When the car speeds up, a certain amount of pressure is exerted on the control arm bushings and other components. Therefore, a small amount of toe-in is provided, which allows the tire to be perfectly straight while accelerating. Toe can be expressed in inches or degrees and is of two types: toe in and toe out.
a) Toe-Out
If the distance between the leading edges of the tires is more than the distance between the trailing edges, it is known as toe-out. If looked at from the top, toe-out is when the tires are slightly tilted towards the outside. Toe-out is used on race cars to improve cornering capabilities of the car.
b) Toe-In
Toe-in is the opposite of toe-out. A car has a toe-in setting when the distance between the leading edges is less compared to the distance between the trailing edges. When looked at from the top, tires are tilted towards the inside. Increased toe-in results in reduced oversteer and improves the high-speed stability of the vehicle. Higher toe-in is used in drag races to compensate for the slack generated in the steering components by the forward thrust. This helps keep the front wheels straight.
How To Perform Your Vehicle’s Wheel Alignment Yourself?
There is no denying the fact that a technically equipped, state-of-the-art wheel alignment equipment will yield precise and good results, but it's costly and rarely does anyone own it at home. However, there are several wheel alignment tools that one can use and take a simple mechanical approach and save a lot on wheel alignment costs. A DIYer or hobbyist who loves to work on a vehicle can use camber/caster gauges and easy-to-use tools to achieve professional results without leaving the garage.
Tools Required
A Spool Of String
Camber Gauge
Caster Gauge
Wrench & Sockets
Camber Bolts
Step 1: Adjusting The Toe Angle With The String Method
- Place the 4 tire jacks around the vehicle, preferably one on each of the four corners. You can also use chairs or any other heavy object.
- Tie the string firmly to each of these objects, so they run along the sides of the car and close to the center of the hub cap.
- Place two pieces of cardboard under the front tires of your vehicle so it becomes easy for you to adjust the tie rods and to move the tires while adjusting.
- Use your tape measure to ensure that the tire jacks are lined up perfectly with each other and are at equal distances. Approximately 4-6 inches from your vehicle is enough.
- Take your string and tie it to the two jacks or objects on the left and right sides of the car. Ensure the string is near the center of the hubcaps. Also, make sure that your car is completely surrounded by a line of string that is tight enough.
- Take the measuring tape and measure the distance between the two strings at the back and front of the vehicle. Adjust the strings or objects they are tied to, making the distance equal.
- With the help of measuring tape, note down the distance between the front edge of the front wheel and the string. Do the same for the rear edge of the front wheel and the string. Measure the distance between the rim of the wheel and the string.
- If the distance between the string and the front edge of the rim is more compared to the rear edge of the rim, the wheels are in toe-out condition. Almost most passenger cars have a slight toe-in that allows the car to traverse in a straight line. Refer to your service manual for the toe-in and toe-out measurements of your vehicle given by the manufacturer.
- Now check whether the tie rods are attached to the front or the rear of the hub of your vehicle. If it is attached to the front of the hub, tightening the tie rods will pull the tires towards the inside from the front. In other words, increasing the toe-in. If tie rods are attached to the back, tightening the inner tie rod will cause increased toe-out.
- Use an open-end spanner to loosen the locknut between the outer and inner tie rods.
- Rotate the inner tie rods clockwise or anticlockwise to toe-in or toe-out your wheels according to the specifications. The toe-in specs usually vary between 1/32 to 1/8th of an inch, depending on the vehicle.
- Measure the distance again to ensure the required distance is achieved. Tighten the lock nut back to ensure tie rods are properly secured.
- Tightening and loosing the tie rods is a simple method to adjust our toe angle. After the toe settings are complete, take the vehicle out for a spin to test that everything is fine, and the steering is straight.
Step 2: Adjusting The Camber Alignment Using Camber Gauge And Camber Bolts
- Start with ensuring the vehicle is secured on jack stands as we have to remove the wheels first. Take a lug wrench, loosen all the lug nuts, and set both front wheels aside.
- Attach the camber gauge to the top center of the brake rotor. It's a magnetic or mechanical tool that can be attached easily. Ensure the camber gauge is straight, perfectly leveled, and set to zero.
- Check the reading and compare it with the manufacturer’s recommended values. This should tell you how far the camber adjustment needs to be. For example, not every car manufacturer has the wheel camber at 0 degrees.
- If the camber is off, you need to adjust it using a camber bolt kit.
- Remove the top bolt that holds the steering knuckle and the front strut assembly. Do not remove the lower bolt.
- Install the new camber bolt and hand tighten the nut.
- Now rotate the bolt using a spanner and see the camber gauge to check the reading. As you rotate, the cam on the camber bolt alters the position of the steering knuckle and wheel hub assembly, changing the camber of the vehicle.
- Once you have achieved the recommended camber values, tighten the nut of the camber bolt.
- Repeat the same procedure on the other side of the front tire.
- After adjusting the camber on both wheels, attach the wheels back. Use a torque wrench to tighten the lug nuts to proper specifications.
Step 3: Adjusting The Wheel Caster
To begin the process, keep the wheels of the vehicle straight and on a level ground.
Use a wooden plank or board and set it against the tire. Use a marker to mark the floor where it meets the wooden plank. This will help you measure the angle of steering using a protractor.
Install the bubble gauge on the wheel of the vehicle and turn the wheel to the left. Place the wooden plank against the tire and mark the floor. Now use a protractor to measure the angle between the lines to ensure your wheel has turned 20 degrees.
Now hold your caster gauge against the wheel and adjust the readings to zero.
Turn the wheel 20 degrees in the opposite direction, towards the right.
Place the caster gauge again on the wheel to see the reading.
Adjust the camber reading according to the manufacturer's specifications by adding or removing shims. For a positive caster, add or remove shims to the rear bolt where the control arm is attached.
The above step can also affect the camber. Therefore, check the camber values again by simply attaching the camber gauge to ensure it's not disturbed.
Some cars have a strut rod attached to the lower control arm that can be moved in and out to adjust the caster, for example, early Mustangs. Shortening the rod increases the positive caster by moving the spindle forward.
Once the caster and camber both are within the required range, repeat the process on the other side of the vehicle.
Street Car | Performance Car | |
| Camber | -0.5 to -1 degrees | 0 to -0.5 degrees |
| Caster | 3 to 6 degrees | +4 degrees |
| Toe-In | 1/16 inch | 1/16 inch |
Therefore, it all depends on your driving style and the car you are driving. Furthermore, the suspension height and use of aftermarket shock absorbers can significantly alter the alignment of your vehicle. Whenever you replace your tie rods yourself or change the suspensions, you don't have to go to the mechanic for wheel alignment. This guide helps you align your wheels yourself at home and saves you a lot of money on replacement costs.
Buying Guides & Articles on Auto Parts
Articles and Guides written by auto parts experts to ensure you have all the required knowledge to make the correct purchase here at Parts Avatar.
Read all Guides & Articles