You Should Know This About Your Car Distributor
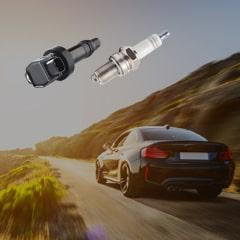
The ignition distributor is a mechanical device that transfers the high voltage current generated by the secondary coil to the correct spark plugs in the proper firing sequence and for the proper time. The ignition is mechanically timed. Learn more about the Distributor of your vehicle and how to properly maintain it.
What Is A Car Distributor?
The distributor is a part of the spark ignition system. It holds a significant place because it allows high voltage pulses to channel from the ignition coil to the spark plugs. You will find the distributor near the coil of the ignition system. These are usually driven by the camshaft, which makes them rotate one-half the speed of the crankshaft. This timing allows the distributor to provide voltage to each of the spark plugs at the right time and in the correct sequence.
How Does My Car Distributor Work?
Want to know the working of a car distributor? In that case, keep on reading further:
When the distributor shaft rotates, it also causes rotation of the cam and rotor. The cam then pushes the cam follower of the contact breaker. This makes the contact points of the contact breaker open and collapse the primary current through the primary winding. Hence, a high voltage current is produced in the secondary winding. This is then transferred to the distributor’s central terminal, which then reaches the outer edges of the rotor via the carbon bush.
When the rotor comes in front of the internal terminal of the spark plug in the car distributor cap, all the high voltage electrical pulses go through to the spark plug. This allows the spark plug to produce a spark within the cylinder head. The job of the distributor is to produce the spark in each spark plug in the right sequence at the correct time. This is how the distributor performs its task.
What Are The Common Car Distributor Problems?
Here are some problems you may come across if the distributor of your ignition system is faulty:
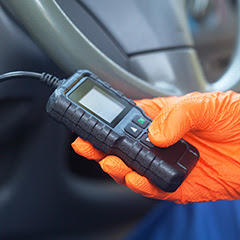
- Your check engine light is on - A faulty distributor can cause an engine misfire, which your vehicle will try to warn you about by switching on the check engine light.
- Unable to start the vehicle - Since the primary task of the distributor is to enable the spark plug to crank the engine, if it’s not functioning then the spark plug won’t be able to do its job. This will cause issues with starting the vehicle.
- Your engine is misfiring - If the distributor isn’t able to provide enough voltage to the spark plugs they won’t be able to create the igniting spark. This will cause your engine to misfire. At this point, you may feel as though the engine is stumbling. Incomplete combustion causes these problems which could very well be due to the distributor.
What Are The Symptoms Of a Bad Distributor?
Here are some symptoms that signify an issue with your vehicle’s distributor:
- Unexplainable Shaking - Shaking whenever the car is running is a sign that the distributor isn’t working properly. You can feel anything from a vibrating sensation to a more apparent shaking which can be felt throughout the vehicle. The lack of proper spinning of the distributor could also be a reason, which will affect the timing and firing process. If the car is idle/ at a complete stop and this kind of shaking is noticed, then it could be because of problematic distributor caps.
- Problem in starting the vehicle - In low outdoor temperatures, this will be even more apparent. In cold weather, the burst of heat that occurs because of the engine running with a cold distributor cap (of plastic) is mostly why the distributor cap can break under heat stress. This can happen even more to those vehicles that are kept in unheated garages or outdoors. It’s best to keep a check on the distributor cap and see if there are any signs of cracks. It also helps to keep the vehicle in a protected environment during colder weather.
- Squealing - If high-pitched squealing noise occurs while starting your vehicle, it means the distributor is going bad. If you aren't able to notice any other issues with your vehicle, simply check under the distributor cap. The build-up of pollutants or grease in the distributor cap can cause the noise to happen. Try to clean it and see if the noise goes away. If it doesn’t then you will have to replace the distributor itself. You will need help from a trained mechanic to rule that out.
Which Tools Do I Need To Repair My Car Distributor?
Are you thinking of repairing your Distributor on your own? Then there is one thing which you must have, that is the right tools needed for repairing your Distributor. It is essential to make sure that you are outfitted with the right tools to get the work done properly. Have a look at some tools which you might need to get started with your repair work:
- Good quality distributor replacement
- New cap and rotor (if not supplied with the distributor)
- Combination wrenches
- Wrenches
- Socket wrenches
- Flathead and Phillips head screwdrivers
- Timing light
- Timing specifications for your vehicle
Which Top Brands Distributor Parts Should I Choose?
For vehicle owners, the brands really matter a lot. You might pay for a specific car part brand, over time, as it has created a perception of quality, stability, and trust. Some leading car parts brands are more than just products or services as they give rise to memories and emotions related to the quality. So have a look at some top brands for Distributor.
- Cardone Industries Distributor Parts
- Richporter Technology Distributor Parts
- Beck/Arnley Distributor Parts
- Autoline Products Ltd Distributor Parts
- MSD Ignition Distributor Parts
- Spectra Premium Industries Distributor Parts
Which Parts Are Related To My Car Distributor?
It is very important to arm yourself with information before you shop for any auto part. We are here to help you dive deep into the names of the Distributor related parts.
- Distributor Drive Gear
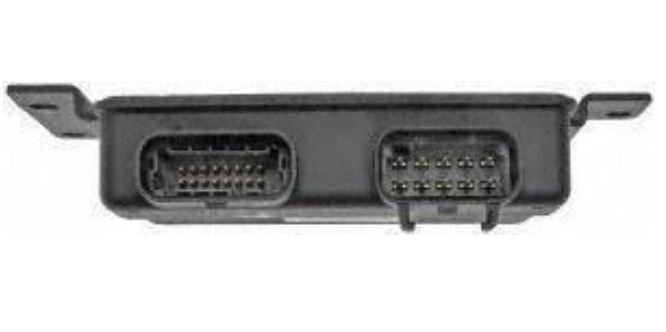
- Distributor Connector
- Distributor Cap
- Distributor Breaker Plate
- Distributor Rotor
- Distributor Breaker Plate
What Is The Repairing Cost Of My Car Distributor?
Distributor replacement costs can differ widely depending on the application, the brand of the Distributor as well as who does the work. All you have to do is to replace your faulty Distributor with us online and then you can leave your car to the mechanic and pick it up a few days later. Just be sure that the car mechanic is highly skilled and has a good reputation. Sometimes the additional service level might cost you more than what you have expected. We also recommend you to take pictures of your car before you leave it with them so that you are sure that later on it is returned to you in an unharmed condition. The average cost for a distributor cap replacement is between $89 and $123. Labor costs are estimated between $50 and $64 while parts are priced between $39 and $59.
What Are The Steps Of Changing My Car Distributor?
Here are the steps to be followed to change the distributor:
Step 1 - Locating the distributor for removal
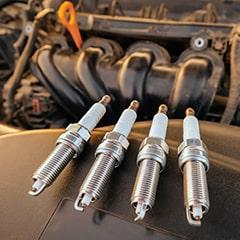
Open the hood to access the engine compartment and look for the distributor. It will usually be a cylindrical part that has thick wires coming out of it. It will be present near the engine. You can refer to your vehicle manual for the exact location. The wires are the spark plug wires and the distributor will have a plastic cap on it. One wire for each cylinder of the engine is present and one additional wire which will be connected to the ignition coil.
Step 2 - Find out timing specifications
Use the timing light to set the timing of the engine once the new distributor is installed. This is mandatory for distributor replacement. You will need to use the timing specifications as per your vehicle model. You can find these in your vehicle manual or online, often a sticker under the hood or in the engine compartment may also have this information present. Don’t install a new distributor if you haven’t been able to find the timing specifications.
Step 3 - Disconnect the distributor cap
Remove the cap, using the basic tools, some caps have clamps that can be loosened easily by hand. In some, you may need screwdrivers or socket wrench to unscrew the screws and bolts (if present) which are holding the cap in place.
Step 4 - Remove the wires attached to the distributor
Mark the wires before disconnecting so that you’re able to put them back in the right place later. For this, you can use electric tape. Make sure the wires are handled when the vehicle is not having any current running through it.
Step 5 - Mark the engine mounting point
Mark a location on the outside of the distributor housing the point where the distributor is mounted to the engine. You will have to choose a spot for which you can find a corresponding location on the new distributor. This will make it simple to line up the new distributor housing.
Step 6 - Mark the position of the rotor
This is a very important step. Your engine will not start if the position of the rotor in your new distributor doesn't match the position of the rotor in your old distributor. Make a mark inside the distributor housing, this will help to indicate the position of the rotor. Be careful and ensure that the rotor in your new distributor will need to match this position precisely.
Step 7 - Remove the old distributor
Remove the bolts that hold the distributor housing to the engine. Now carefully and delicately pull the distributor away from the engine. There is a possibility to accidentally move the rotor when you remove the distributor, in such a case as a reference point use the position of the rotor that you originally marked.
Step 8 - Recreate the marks on the new distributor
Mark your old distributor’s rotor position inside the new distributor's housing. Also, mark the location on the outside of the distributor which lines up with your engine's mounting point. This will help you perform installation smoothly without any confusion. Ensure the rotor is lined up as per marking and install the distributor. Be sure to not accidentally nudge or move the rotor while doing this.
Step 9 - Mounting of a new distributor
Be careful while doing this step, start by re-fastening the distributor in the same spot as the old one. Line it up as per marking on the distributor housing. Re-screw the screws and bolts as per the requirement so that the distributor can be held in its place. Be precise but don’t tighten these fasteners the whole day, you will have to have the space to move the distributor slightly by hand.
Step 10 - Reconnect wiring and replace the cap
Connect all the wires back to their original places as per the marking you had made. Fasten them and double-check that it's reattached in the location that corresponds to its previous location on the old rotor.
Step 11 - Start vehicle
Once you are certain all the connections are correct, you can now attempt to start your vehicle. Crank the engine and see if the vehicle starts. If the vehicle doesn’t start, adjust the rotor position according to the markings made earlier. If the vehicle still refuses to start, adjust the rotor in either direction till the vehicle starts and idles smoothly.
Step 12 - Adjusting the timing
Now stop the engine and put a timing light on the 1st spark plug. Follow the instructions in your vehicle manufacturer’s manual for this. Adjust the timing by rotating the distributor housing, in tiny amounts. Once the distributor has been set to the correct timing, tighten the fasteners you had left a little loose in step 9.
Step 13 - Test drive your vehicle
Test out your vehicle by making your engine go through different accelerations. If you cannot get the right performance you will need to have a professional check it for what the problem might be.
Buying Guides & Articles on Auto Parts
Articles and Guides written by auto parts experts to ensure you have all the required knowledge to make the correct purchase here at Parts Avatar.
Read all Guides & Articles