Step By Step Guide To Flush A Car’s Radiator
Vehicles require routine maintenance to function properly. Though some maintenance tasks appear simple and easy, neglecting them for extended periods can have a significant impact on your vehicle. One of the important maintenance tasks is to flush your car's radiator.
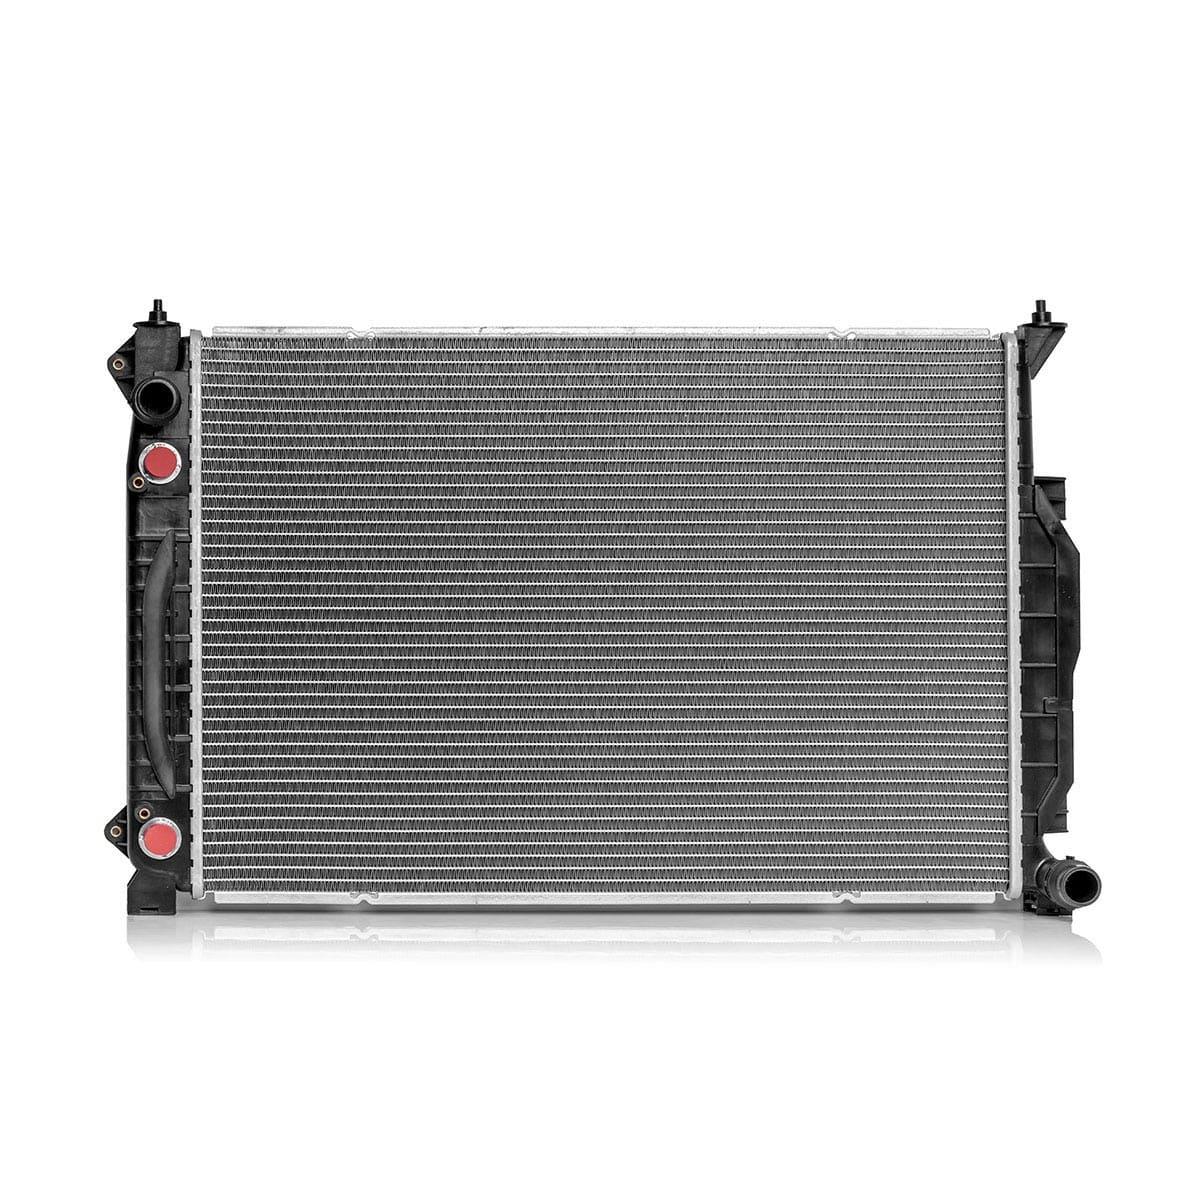
The radiator is the most important part of your vehicle's cooling system. It is responsible for distributing liquid coolant (antifreeze) to various engine components to prevent them from overheating. Over time, dirt and contaminants can pile up in the radiator’s coolant, leading to radiator corrosion, a faulty cooling system, damage to engine components, and engine failure. So, it is important to flush your vehicle’s radiator coolant completely and then refill it with new coolant after a specific period of time or mileage as mentioned in the owner’s manual.
Here is a step-by-step procedure on how to flush your vehicle’s radiator on your own.
Things To Consider Before Flushing A Car’s Radiator
Before you begin flushing your car's radiator, you will need the following items: rubber gloves, safety glasses, a car jack, jack stands, a nylon brush, mild dishwashing soap, warm water, a drainage pan or bucket, old plastic jugs, a screwdriver or socket wrench, a funnel, radiator cleaner, distilled water, and coolant.
Before proceeding with flushing a car's radiator, it's crucial to consider several essential factors. Here are some things to keep in mind:
Consult Your Vehicle Manual: Make sure that you consult your vehicle's manual for specific instructions and recommendations. It will give you valuable information about the radiator system, including the type of coolant required and any specific flushing procedures recommended by the manufacturer.
Safety Precautions: Radiator fluid can be very hot and toxic for health, so it is important to take necessary safety precautions. Ensure the engine is cool before beginning the flushing process. Wear gloves and eye protection to prevent any contact with the fluid.
Identify the Coolant Type: Identify the type of coolant currently in the radiator. Different vehicles may require different types of coolant, such as ethylene glycol-based or propylene glycol-based coolants. It's important to use the correct type of coolant to avoid potential damage to the cooling system.
Flushing Method: Determine the preferred method of flushing. There are two common methods used for flushing: using a radiator flush solution and performing a simple water flush. Some manufacturers may recommend a specific method, so refer to the vehicle manual for guidance.
Tools and Equipment: Collect the necessary tools and equipment for the flushing process. This may include a coolant drain pan, a wrench or pliers to remove the drain plug, a funnel, a hose for water supply (if performing a water flush), and a flushing solution (if using a radiator flush product).
Environmental Considerations: Be mindful of the environmental impact of disposing of the old coolant. Coolant contains hazardous chemicals. Make sure that you dispose it properly according to local regulations. Also, many auto parts stores or service centers accept used coolant for safe disposal.
System Inspection: Before flushing, inspect the radiator and cooling system for any signs of damage, leaks, or corrosion. If you notice any issues, it may be necessary to address them before proceeding with the flush.
System Refill: After the flushing process is complete, ensure that the system is refilled with the correct type and amount of coolant as specified in the vehicle manual. Use a coolant mixture of the correct coolant-to-water ratio.
Regular Maintenance: Consider the overall maintenance of the cooling system. Flushing the radiator is an important maintenance task, but it's also crucial to maintain proper coolant levels, check for leaks, and adhere to the recommended coolant change intervals as specified by the manufacturer.
If you're uncertain or uncomfortable performing a radiator flush on your own, it's advisable to seek assistance from a qualified mechanic or professional automotive service center to ensure the task is completed correctly and safely.
Step-By-Step Guide To Perform Flushing Of A Car’s Radiator
Step 1. Determine Whether or Not You Should Flush Your Car Radiator
The right time to flush a radiator is determined by a number of factors. The first and the most important one is the make and model of your vehicle. Knowing everything about your vehicle will assist you in determining whether it is time for a radiator flush or not. Another important consideration is the model year of your vehicle. If your vehicle is old, it's usually time to flush the radiator. If it's more than five years old, it's time to flush the radiator and replace the coolant. The time of flushing a radiator is also determined by the mileage of the vehicle. You should flush your vehicle’s radiator after it reaches the mileage mentioned in the manufacturer’s manual.
Step 2. Ensure That Your Vehicle’s Engine Is Cool
Once you've determined that you need to flush your vehicle's radiator, also known as a coolant flush, place your hand on the engine block to determine whether it's hot or cold. If your engine is hot, do not start it and wait at least 30 minutes for it to cool. Also, check the coolant temperature on your car's dashboard.
Step 3. Wear Protective Gears And Work In An Open Area
Wear safety glasses to safeguard yourself from accidental fluid splashing. Wear rubber gloves to keep your hands safe and lean while working with dirty fluids and the interior of your vehicle.
Step 4. Raise the Front Side of the Car Using a Car Jack Stands
Lift the metal frame of the front underside of your car using a car jack and support it with two jack stands. This will help you reach beneath the vehicle and fit the drainage pan or bucket underneath. Put your car in park to keep it from moving while you flush the radiator.
Step 5. Locate And Clean Your Vehicle’s Radiator
Open the hood of your vehicle and locate the radiator. The radiator is a narrow and long metal tank located at the front of the hood, just beside the engine. Once you open the hood of your vehicle, you'll probably see some dirt, debris, and filth collected on the radiator's outside part. Use warm, soapy water and a brush to remove the dirt and debris from the radiator. Also, check the radiator tubing for rust, cracks, and corrosion before starting the radiator flush procedure. If you find any of these problems, replace that part immediately.
Step 6. Drain Out The Coolant
Look under your car to find the radiator petcock valve or drain valve. The petcock valve is situated on the radiator’s bottom left or bottom right. Once located, get a drainage pan or bucket and keep it directly under the drainage plug or petcock valve. Slowly open the pressure cap, or radiator cap which is located at the top of the radiator by twisting it counterclockwise. Then using a screwdriver or socket wrench slowly open the petcock valve or drain valve. Once you’ve opened the drainage plug, wait for the coolant to completely drain out from the radiator into the drainage pan or bucket. After this, close the petcock valve or radiator drainage plug. Now, dispose of the radiator’s coolant accordingly.
Step 7. Pour The Radiator Cleaner and Distilled Water Into The Radiator
After draining the radiator and opening the radiator cap, use a funnel to pour a full bottle of radiator cleaner followed by a gallon of distilled water into the radiator reservoir. Replace the radiator cap after you've finished filling it.
Step 8. Start The Engine Of Your Vehicle
After that, start your car’s engine. Heat it for no more than 15 minutes to allow the cleaning fluid and water mixture to cycle through the whole cooling system and clean it. The engine and radiator cleaner fluid in your vehicle will now be heated. To protect yourself from getting burned, turn off the engine and let it cool for 15 minutes before continuing the flushing.
Step 9. Drain Out The Radiator Cleaner And Distilled Water
Once the engine has cooled completely, open the petcock valve or drain plug and the radiator cap simultaneously to drain the radiator. To hold the cleaner and distilled water, position the drainage pan or bucket beneath the petcock valve. Then, once more, close the drain plug.
Step 10. Pour Coolant In The Radiator
Check your owner's manual to determine how much coolant to add to your vehicle. It is usually half a gallon of new antifreeze (coolant) mixed with half a gallon of distilled water. This can be easily made in one of the distilled water containers. Alternatively, you can use a ready-to-use 50/50 mixture of coolant and distilled water, which you can buy online from our website. Pour in the solution after opening the radiator cap or pressure cap using a funnel until it reaches the fill line.
Step 11. Restart The Engine Of Your Vehicle
Restart your car to allow the antifreeze (coolant) to enter your cooling system, and turn the heater to its highest setting for 15 minutes. It aids in clearing any air that could have entered the radiator. After that, take out the funnel and close the radiator cap.
Step 12. Check That The Radiator Is Full
After 15 minutes, restart the engine and remove the radiator cap or pressure cap. Then, check to see if the coolant and water mixture reaches the radiator's fill line. If not, add some more mixture. If any coolant or water remains, you can either store it in the overflow container or save it for the next time you flush a radiator.
Tips for Maintaining Your Vehicle's Cooling System:
In addition to flushing your car's radiator, there are several tips you can follow to maintain your vehicle's cooling system and prevent overheating issues. Regularly check the coolant level and fill it up if necessary. Inspect radiator hoses for any signs of leaks or cracks and replace them if needed. Keep an eye on the temperature gauge while driving and address any sudden spikes in temperature immediately. It's also important to clean the radiator fins periodically to remove any dirt or debris that may hinder proper airflow. By following these simple tips, you can ensure that your vehicle's cooling system remains in optimal condition.
Common Mistakes to Avoid When Flushing Your Radiator:
While flushing a car's radiator is a simple process, there are a few common mistakes that people often make. One of them is not allowing the engine to cool down properly before starting the flushing procedure. This can result in hot coolant splashing out and causing burns. Another mistake is failing to properly dispose of the old coolant. Coolant is toxic and must be disposed of according to local regulations. Additionally, rushing through the process without properly cleaning the radiator or checking for damage can lead to incomplete flushing or other issues. To ensure a successful radiator flush, take your time, follow the steps carefully, and avoid these common mistakes.
Expert Advice: When to Seek Professional Help:
While flushing a car's radiator can be done as a DIY task, at times it is best to seek professional help. If you're unsure about any step of the process or lack the necessary tools and equipment, it's recommended to consult a qualified mechanic or radiator specialist. They have the expertise to handle more complex radiator issues and can identify any underlying problems that may require professional attention. Additionally, if you encounter major leaks, severe corrosion, or persistent overheating even after flushing the radiator, it's advisable to have a professional inspect and identify the problem. Remember, ensuring the proper functioning of your car's cooling system is crucial for your vehicle's performance and longevity, so don't hesitate to seek professional assistance when needed.
In conclusion, flushing your car's radiator is a crucial maintenance task that ensures optimal cooling system performance. By following this step-by-step guide, you can effectively remove dirt and debris, preventing potential damage and costly repairs. By dedicating time to this process, you can maintain your vehicle's longevity and enjoy a reliable driving experience.
Buying Guides & Articles on Auto Parts
Articles and Guides written by auto parts experts to ensure you have all the required knowledge to make the correct purchase here at Parts Avatar.
Read all Guides & Articles